Sunday, 25 November 2012

PHOTOGRAMS


This lesson was quite an experience for me because I have learned a new technique that will be very useful in the future.  Since it was our first lesson in the darkroom, we had to get through some safety procedures before we could enter the room. Our main task was to create a few photograms from objects we earlier found outside (leaves, stones, literally anything). I should probably explain what a photogram is, before I say more. A photogram is a picture made in the darkroom without a camera. It requires photographic paper, a timer, a few objects for the idea, and an enlarger. The final effect is usually a negative picture with the shadows of the objects placed on it. Depending on how much light the photographic paper is exposed to, the tone will change. The first time around I used only 5 seconds of light. I had some difficulties with the aperture and the developers so I asked Ania to be my guide through the whole process, since she had already worked in a darkroom before. This was quite helpful for me, especially during the development process in which the film is treated in chemicals. There are three trays, one for each liquid (to develop, to stop, and to fix),some are more or less toxic, but altogether if you are a very curious monkey you probably should go see this page. A nonstop water supply is also very important not only for the developing process but also for safety.


During the lesson I did not have any specific creations in mind. So I decided that my main objective should be to simply complete at least 3 different photos, which are presented below:


research materials taken from:
http://www.photograms.org
http://sliceofpink.typepad.com
http://www.diyphotography.net
http://en.wikipedia.org


Saturday, 24 November 2012

Exposure Histograms

Overexposure- occurs when there is too much light. The aperture could be too wide, the shutter speed too long or the film speed incorrectly set too low. With digital cameras and slide films the result is a thin, washed-out image. The highlight detail is gone completely.

Underexposure- Happens when there is not enought light. Although neither is recommended, it is easier to correct an underexposed digital image than one that is overexposed. The aperture could be not too small, shutter speed not short or the film speed high set too high.

Taken from the book: "The Manual of Photography" by Ralph E Jacobson, Sidney F Ray, Geoffrey G Attridge.

1. Screen grabs for

a) over-exposed

b) correct-exposed

c) under-exposed

2. Examples from school, with Input and Output Levels.

a. over exposure
 b. under exposure


My Photography

I have selected a few photographs that look interesting to me. Some of them have been made in London and some in Chichester.
 A good idea for a pattern.
 Looks kinda like bubblegum...
I finally convinced the seagull to pose for me^^
I am not a big fan of graffitis, but this one caught my eye. It has a really good choice of colours (pink and gray), which looks very effective!
Understanding Light

Reaserch:

Books from Chichester Library:
"The Visual Dictionary of Photography" by David Prakel
"The Manual of Photograpy" by Ralph E Jacobson, Sidney F Ray, Geoffrey G Attridge.
From the internet :
http://www.PhotoExtremist.com
http://www.pcmag.com
http://photo.net
http://silverstrandphoto.wordpress.com
http://www.shortcourses.com/use/using1-9.html


These are the three camera settings that affect the photography exposure.

ISO speed- Film speed is a standaridised measure of the speed at which the film reacts to light.


•Use an ISO of 100 or 200 when taking photographs outside in sunny conditions.


•If the sky is overcast or it is evening time, then use an ISO within the range of 400 to 800.

•Night time or in cases of low light you might need to set your digital camera ISO to 1600. If you don't then your photo will appear too dark if at all.


SHUTTERSPEED- The precisely controlled time the shutter stays open during exposure- usually measured in fractions of a second.

In photography and digital photography the shutter speed is the unit of measurement which determines how long shutter remains open as the picture is taken. The slower the shutter speed, the longer the exposure time. The shutter speed and aperture together control the total amount of light reaching the sensor. Shutter speeds are expressed in seconds or fractions of a second. For example 2, 1, 1/2, 1/4, 1/8, 1/15, 1/30, 1/60, 1/125, 1/250, 1/500, 1/1000, 1/2000, 1/4000, 1/8000. Each speed increment halves the amount of light.


above diagram is shutter speed


APERTURE- Is just another word for hole. Adjusting the size of the hole controls the intensity of te light passed by the lens. A device that controls the amount of light admitted through an opening. In photography and digital photography, aperture is the unit of measurement that defines the size of the opening in the lens that can be adjusted to control the amount of light reaching the film or digital sensor. The size of the aperture is measured in F-stop.


A very informative video!!!

Tuesday, 20 November 2012

BILL BRANDT


If I should describe Bill Brandt, I would simply describe him as a dirty old man. But then, on the other hand, I really like his photography. Using the female body as his main subject, and by just forming the body and playing with shadows he is able to show us things that we in daily life never recognize. We do not need a  amazing scenario or situation to make a good photo. I just noticed that one of my book covers for "Beautifully Unhinged" may perfectly match his photgraphic style. 


all copyrights reserved to Bartosz Ladosz
TATE MODERN EXHIBITION


I really enjoyed my trip to the Tate gallery, even though I spent roughly only 50 minutes inside, (time managment was never my strong suit!). The limited time made me hurry, so my priority was not to take as many photos as possible, but to take only pictures of the art I liked the most. I know it sounds uncultured, but in this situation I had no choice. What I have learned from this trip is that before going to an art gallery I should do some quick research on the exhibition, so later I can manage my time better and focus on everything.


 Edwin Henry Landseer "Dignity and Impudence"
 Henry Moore "Woman"
 Herbert James Gunn "Portrait of Sir William Oliphant Hutchison"
 Eduardo Paolozzi "Cyclops"
 Lucian Freud "Girl with a Kitten"
 Clive Branson "Portrait of a Worker" circa 1930
 Ceri Richards "Two Females"
Hans Eworth- Portrait of an unknown Lady
Peter De Francia "The Bombing of Sakiet"
Meredith Frampton "Sir Clive Forster-Cooper" 1945
Edward Wadsworth "Bronze Ballet"
Winifred Knights "The Deluge"
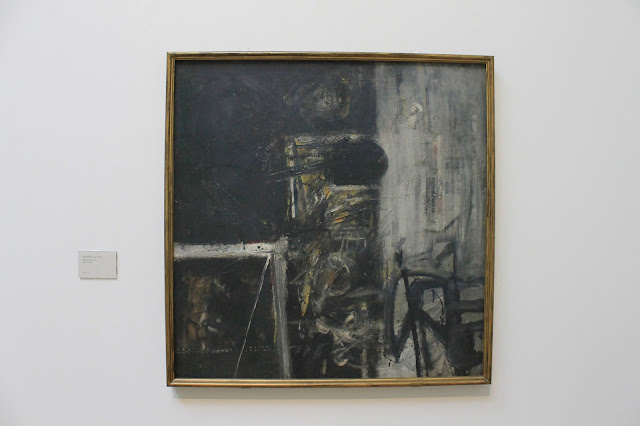
Alan Davie "Black Mirror" 1952
Howard Hodgkin "Blood"
 John Latham "Belief System" 1959 (Books, Plaster, Metal,  Light Bulb, and Paint on Canvas).  I made very clear/sharp photos from different angles, to show the incredible 3D effect  of this art piece.
Gerald Brockhurst, Portrait of Margaret, Duchess of Argyll.
This is definitely my favourite painting of them all. I am not sure if the picture would be so incredible without the golden frame. The torso portrait may not look unique, but the well matched palette of tones and the beautifully made frame make a well balanced  composition. I never liked over-bright rainbow colours, so the elegant black with gold matches my taste here. The precise details seen in the jewellery and frills reminds me a little of some of the Renaissance paintings. The background behind the Duchess is a mountainous landscape, which makes her character look more like a woman with a strong character. I will definitely look back at this portrait as a perfect example of composition and tone balance.

Sunday, 14 October 2012


An update on 2 quizzes we have done recently. I am not a big fan of writing tests and quizzes, but here it is! (I successfully recovered the paper sheets from under my bed.) Even though the resolution of the scans is low, the information there is very helpful and valuable to me! 
To see "Beautifully Unhinged - Photo shoot plan" go to next post 


Health & Safety precautions when working in the studio.

Safety in the studio is very important, so here are some safety precautions to take:
-Do not run in the studio.
-Keep your working space clean and tidy (especially when you are a hobo).
-Always clean before you leave the studio.
-Do not eat in the studio.
-Always ask before you use the equipment.
-Make sure you know where the nearest exit is.
-Always look under your feet.
-Make sure all the equipment is in the right place.
-Always return the equipment to the previous place.
-Do not bring dangerous objects into the studio.
-I know that it is easy for everyone just to say don't run around the darkroom. Watch out when you are working with toxic chemicals, don't dip your nachos in the fixer...etc. But I think it's a bit more complicated than that. So I have found some very detailed health and safety precautions when working in the darkroom below.